
Using Python in CloverDX

Python has long been one of the premier choices for data engineers looking to organize, clean, and analyze data from various sources. It is relatively easy to learn with powerful libraries that enable anyone from data scientists to business analysts to work with datasets to derive value.
However, utilizing python for data parsing, organizing, and cleansing at an enterprise scale often leads us into the trap of re-inventing the wheel when we try to script handling the intricacies of real-life data processes. Parsing files, handling exceptions, or scheduling scripts in cron are just a few tedious jobs you shouldn't be doing yourself in 21st century. By combing your Python skills with a complete data integration platform like CloverDX, you can focus on deriving value from your data rather than wrangling with mundane tasks that surround your business logic.
CloverDX gives you the flexibility to connect to any data source, on-prem or in the cloud, in any format. We can use CloverDX to push our data through data pipelines that will parse, clean, and transform your data into something we can use in analytic processes. CloverDX is designed to be the robust data backbone of an organization. Supporting Python-based analysis and data manipulation is just one of the many ways we can transform organizations’ data infrastructure.

In this example, we’re going to grab sales data from a CSV file, clean/validate our data, push it through a python script utilizing NumPy libraries for analysis, and finally write out to a target database for our Marketing team to use.
Setup
I've already written a python script to take incoming sales data, analyze it, and turn it into a readable Excel report for our Marketing and Sales teams. I can leverage CloverDX to act as my ingestion engine to easily grab data from any source on the fly without having to manually re-write how I pull and parse data in my Python script.
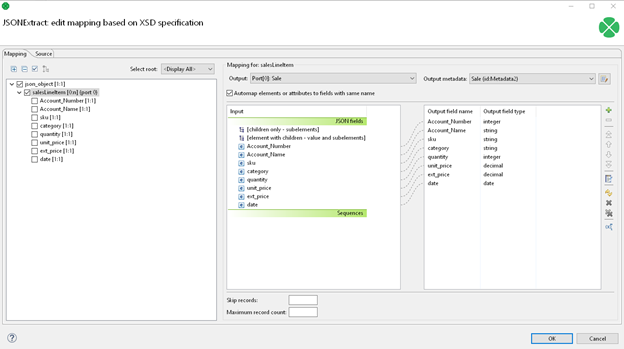
First, I'll use a JSON Extract component to pick apart a piece of JSON and restructure it so that I can effectively use it as an input into the rest of our data process. In this case, I’ll be restructuring into a flat CSV format.

My JSON Extract Mapping looks like this:

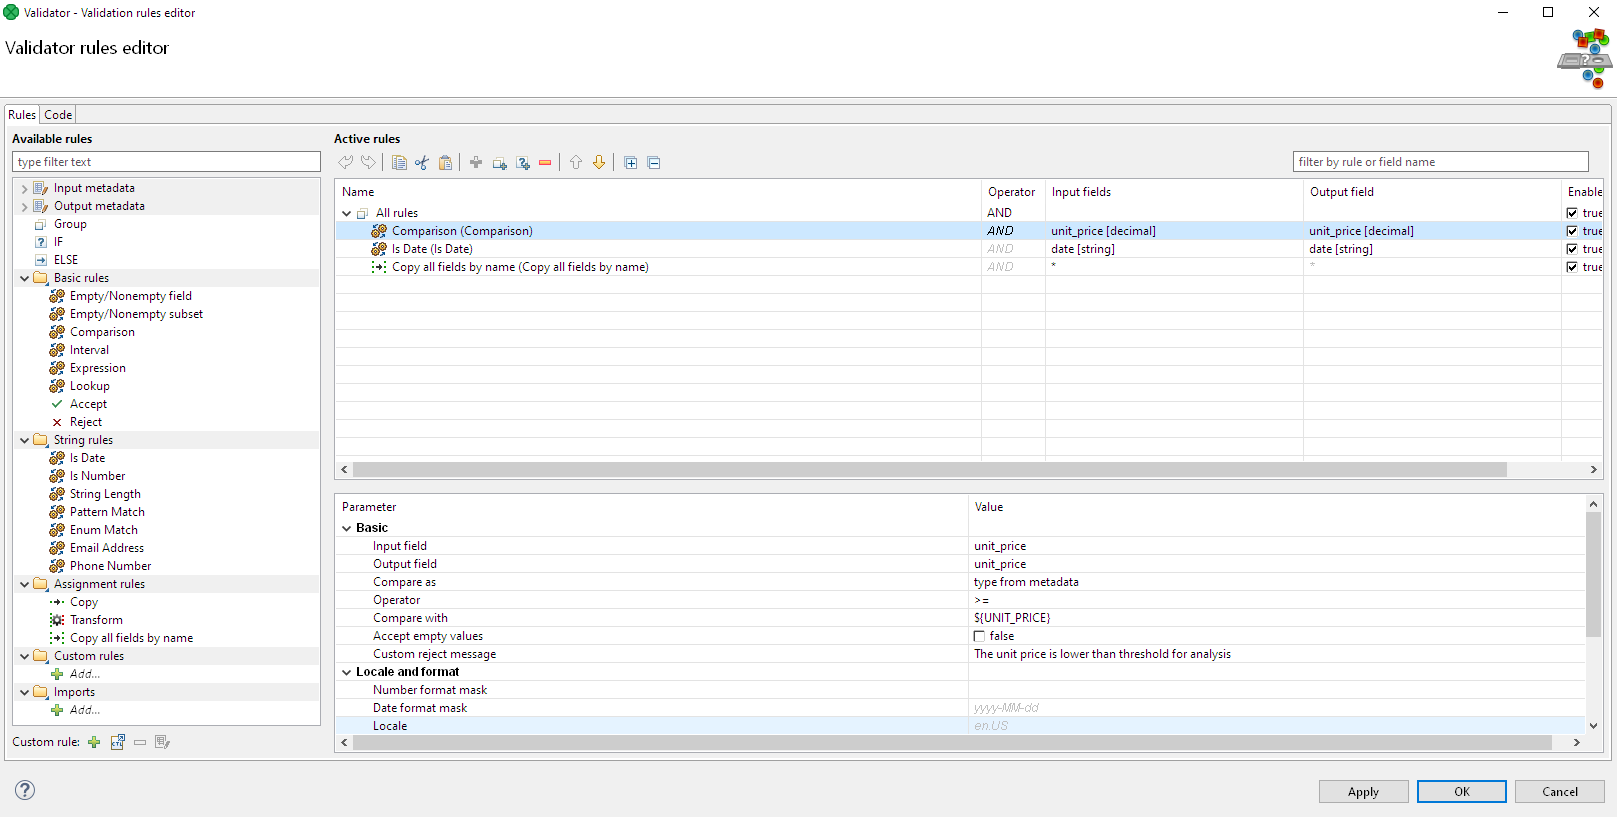
My Data Validation component will allow me to create the following rules:
Our next step is restructuring our data into standard-in (stdin) format so we can run it through our python script.


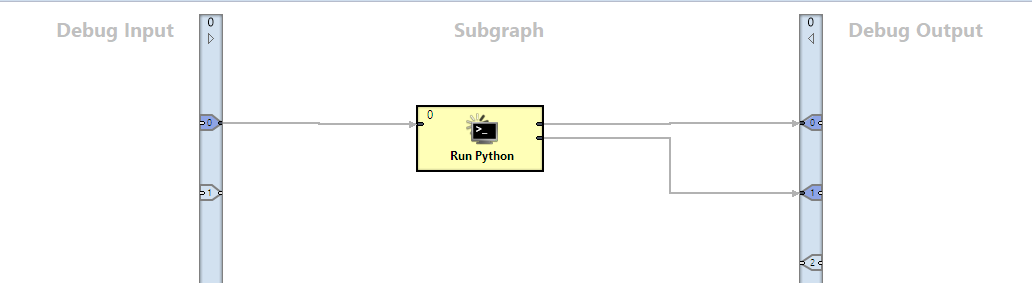
In this example, we're using an Execute Script component to call out to my Python script.
Within this component, we can run any script (including Python). We can either paste our script directly into the “Script” input box or we can provide the URL of our .py file in the “ScriptURL” box. We can also parameterize all of these inputs to dynamically call on different data sources and analysis processes from a single graph.
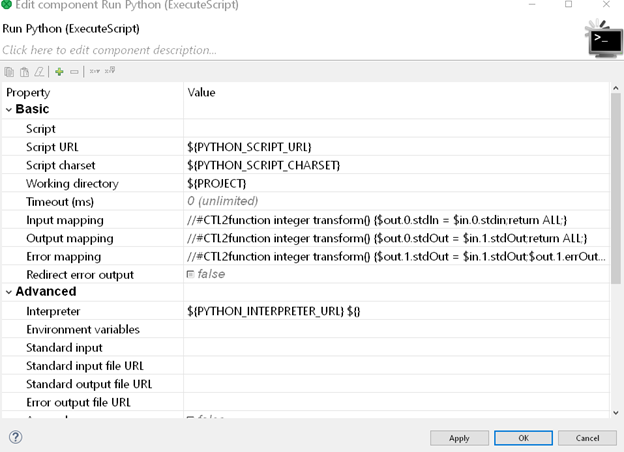
Our script is going to be called on the incoming stdin input. The Python script looks like this:
import sys
import pandas as pd
import numpy as np
sales = pd.read_csv(sys.stdin)
report = sales.pivot_table(
values = ['ext price', 'quantity'],
index = ['Account Name'],
columns = ['category'],
fill_value = 0,
aggfunc = np.sum
)
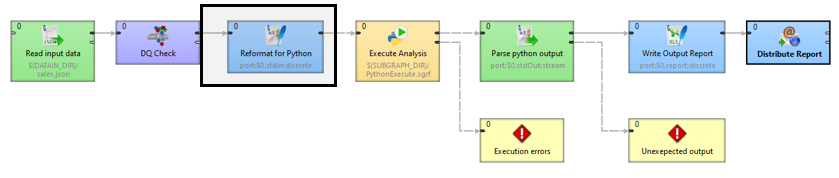
report.to_csv(sys.stdout, index = True, header = False, line_terminator = '\n')The resulting analysis from our script is going to go the the output port of our subgraph and out back into our original graph.
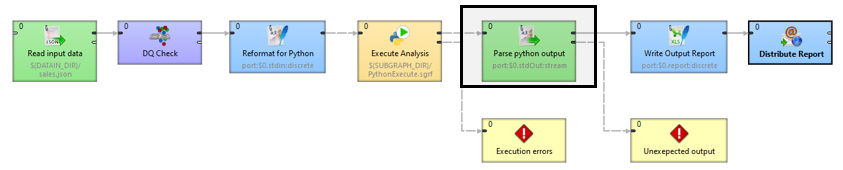
Now that we've set up our Subgraph, let's go back to the graph level to add some finishing touches.
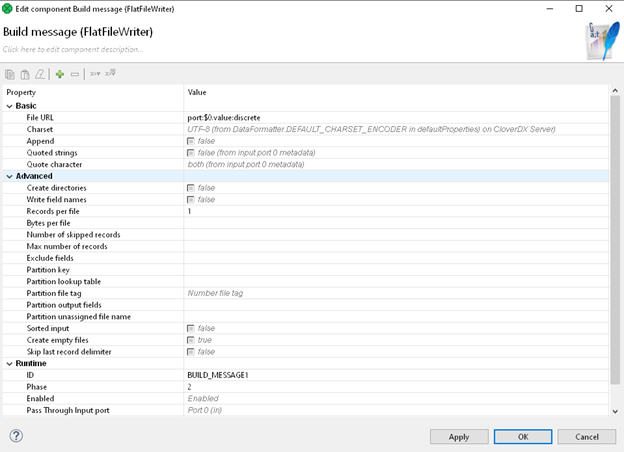
Our subgraph output is going to be a single continuous string in Python StdIn format. We’re going to run it through a Flat File Reader to normalize it into a columnar form that’s easier to digest in the form of a business report.

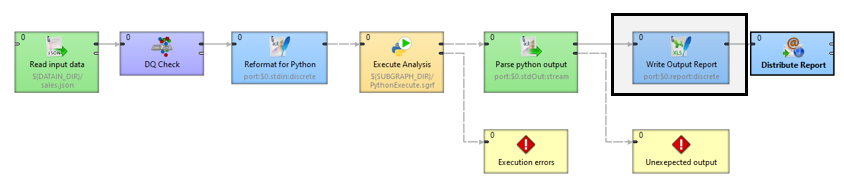
Finally, we can convert this output into a nice Excel report using our Excel Spreadsheet Writer Component.
Our spreadsheet report output is going to look like this:

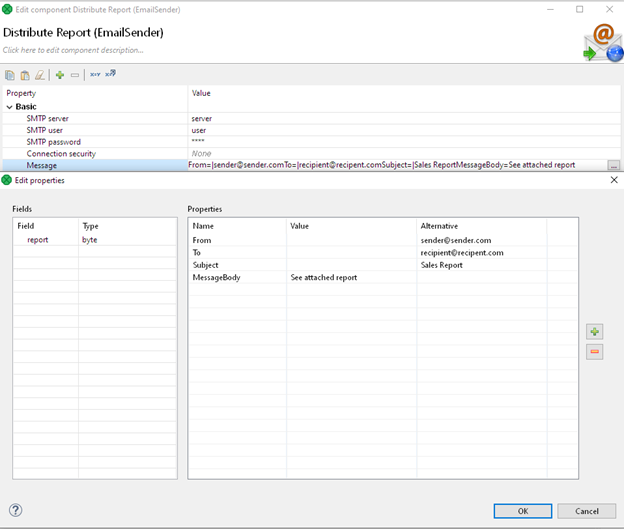
Now we can focus on the final part of our process: distributing our report via email:
More from Tech Blog
-
Organizing large projects: Separating Configuration and Data
When you start working on a CloverDX project, you'll notice that it comes with a predefined structure see here for more details. This structure works... CloverDX How-To -
Efficient data modelling with DBT and ETL data pipeline
In CloverDX we sometimes get a question if and how we can work with DBT. These questions typically come up when IT/data engineering wants to empower data... Analytics and BI -
Building custom REST APIs for ETL processes
HTTP APIs currently drive data integration space. No matter which system enterprises use, most of them these days do support some way to extract or modify... API -
Under the hood of CloverDX Cluster
We frequently get a question what a CloverDX Cluster is, how it works and advise around configuration. So let me shed some light on it as I’ll try to... Deployment -
CloverDX Server installation on RHEL and CentOS
Starting CloverDX 5.16.0, server installer is available via an RPM package making it easy to install and maintain going forward using YUM or DNF package... Deployment -
CloverDX as Kafka event consumer
In previous article, we covered how to establish a Kafka connection and how to publish messages into a Kafka topic. This article will cover the other side... CloverDX How-To